In just under three weeks, we have finished stage 1 of our four stage kitchen renovation!
Yes, we could have finished it a little faster but we had to take off a few days here and there thanks to Covid 2nd vaccine day-after effects and having a few bad night thanks to our arthritic dog. (We have found it is better not trying to do delicate work like placing handles when you’ve had about two hours sleep and are grumpy to boot.)
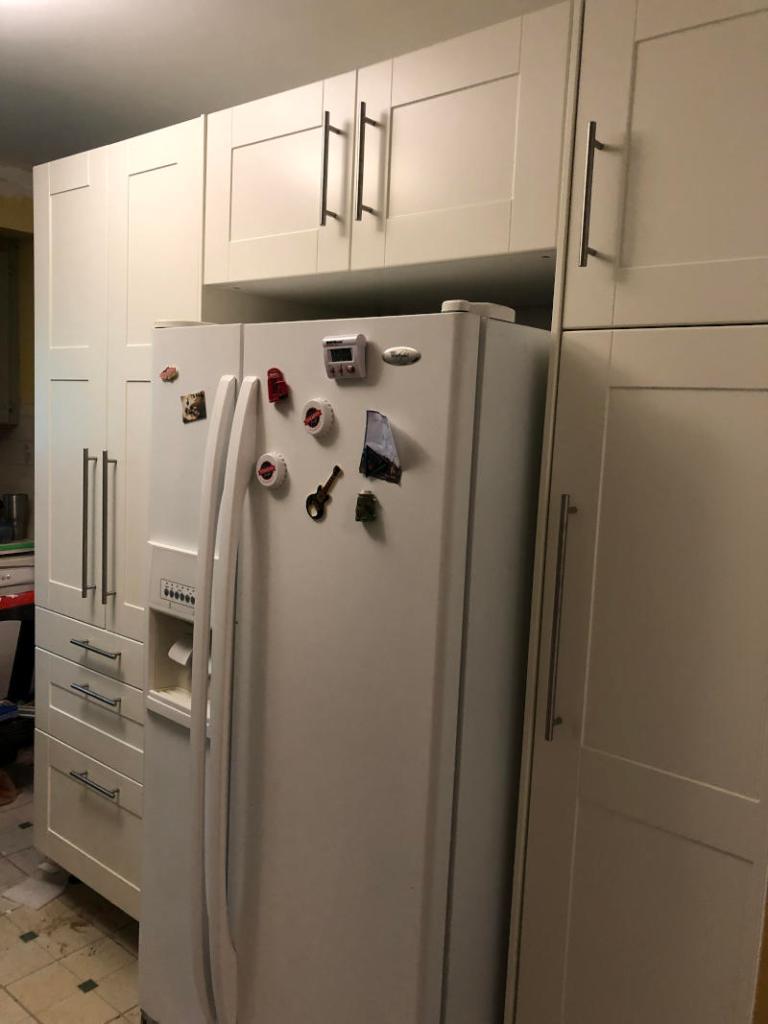
Stage 1, 97% complete
We still need to install the toekicks but we don’t plan on doing that until the flooring is installed, which will be the last step. And we may add some crown moulding at the top of the cabinet to give it a really nice finished look, but again, that comes after everything else. For now, we are considering this stage done. I also like that it leaves us some room for growth when it comes time to replace the fridge. (The fridge currently is 33″ wide going into a 36″ space, and as you can see there’s a few inches of height to spare.)
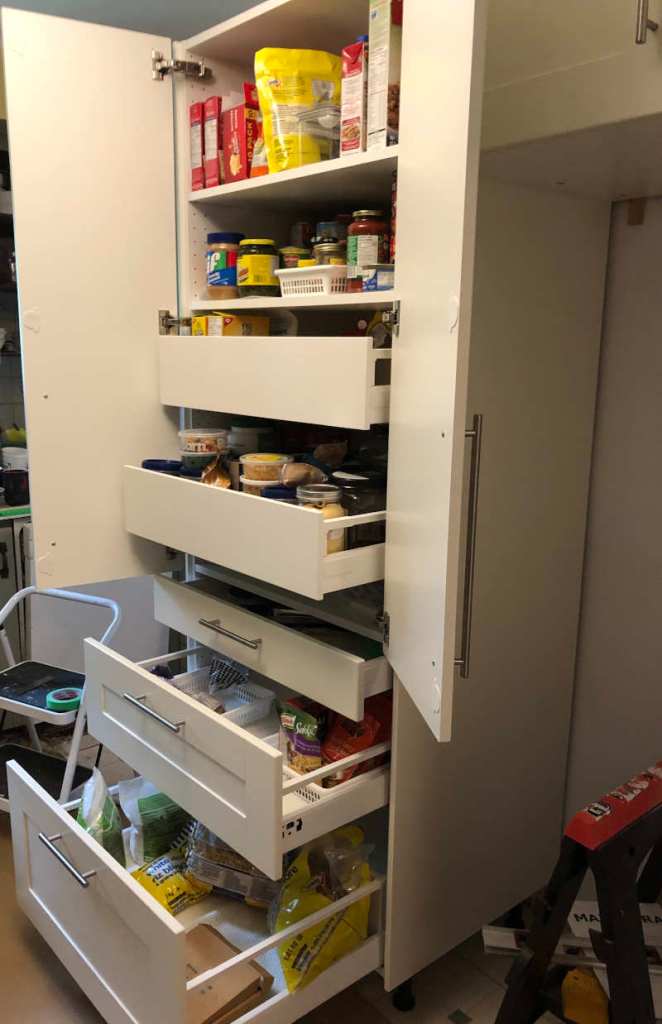
My pantry, which I am still trying to organize
I adore the pantry! I actually have moved my cutlery back in the kitchen! Because of how little storage space and how all the only drawer that could contain cutlery broke long ago, we’ve had to keep the cutlery in the dining room for the last five years. It won’t stay in this cabinet–it will eventually be moved to a different base cabinet, but for now this is its new home and we are all thrilled to have the cutlery so close to hand.
There were a few challenges to building the internal drawers for the pantry that I will document in a different post, and thank heavens we invested in a jig to drill the holes for the door and drawer handles. Definitely worth the money because Ikea doesn’t include any sort of template with their Kallrör handles.
The intention is this cabinet to be for food only, but once I realized I can only reach that top shelf with a stepstool, I have decided that that shelf might be a little too high to keep food in and not have it go out-of-date or rotten. I’ll probably end up keeping Christmas bowls and other seldom-used items that won’t go bad up there. But for now we’re keeping items up there that will end up in Stage 2 cupboards.
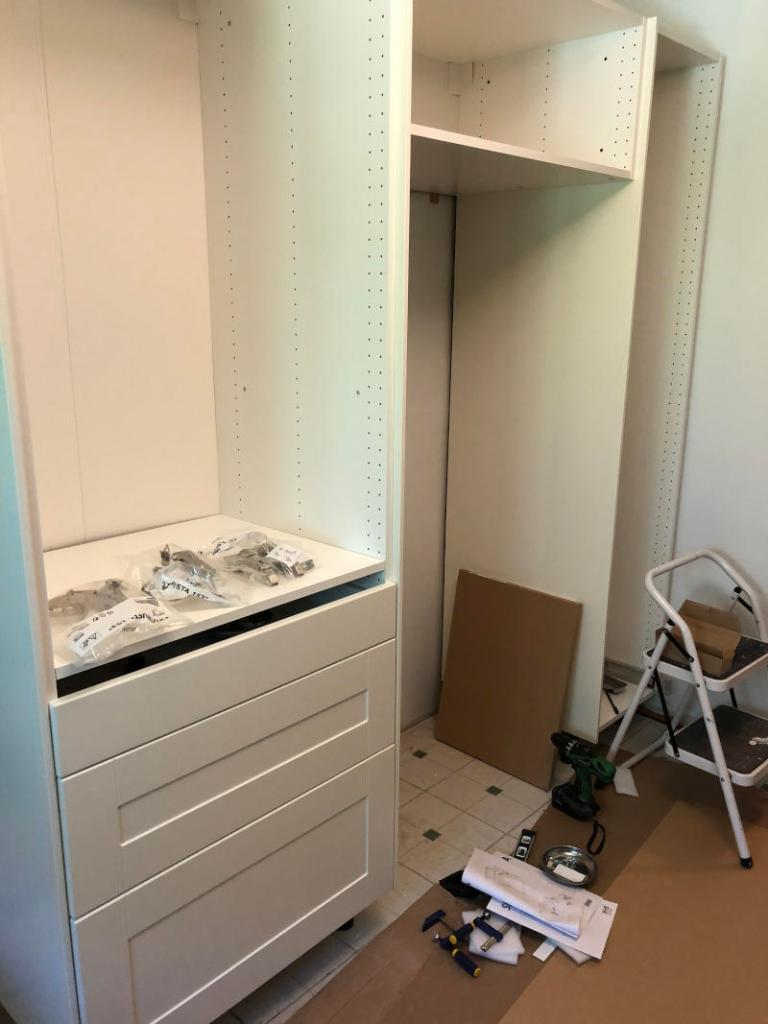
My cleaning cupboard! Somewhere to keep my brooms and mops as well as freeing up the under-sink space (taken before the fridge was moved into place)
I also adore the extra room my cleaning closet provides, though I am undecided about the pull-out addition. Ikea implies the unit can also hold brooms. Um, make that “broom”, singular. Which it really doesn’t. I ran out this morning and bought some Command hooks to hold the broom and mop instead. The unit really needs another shelf though I’m not sure you can buy them individually or not. All in all, I’ll try and live with it for the next few weeks to see if it grows on me but I may end up returning it and just add some smaller shelves (like this idea).
Best of all, with the fridge out of its old position, we have already started Stage 2 and removed the nasty old cupboard that was above the fridge. Which lead to a few new discoveries we have to deal with. But that’s a post for another day. For now we’re just happy dancing that we finished Stage 1 and we have a pantry and cleaning closet and can FINALLY open the freezer doors of the fridge properly.
Lots got done this week. I finished taping and mudding the drywall both on the kitchen wall and on the dining room side. (More on what we discovered on the dining room side in another post). I like taping and mudding–it’s a real artistic endeavour for me. Once the walls were looking reasonably smooth, I then sanded, primed and painted both that wall and an adjoining wall in the kitchen (as I’ve implied the dining room presented some extra challenges so I’ve decided to tackle that task later.) Best of all, we now have three of our biggest cabinet frames up–the 18″ (Width) x 24″ (Depth) x 80″ (Height) cleaning cabinet, a large 36″ x 24″ x 15″ over-the-fridge cabinet and the 30″ x 24″ x 80″ pantry. (It is difficult to get a decent photo of them since they are so large and I can’t get far enough back from them to get them all in the shot.) We have added the cover panels between the two high cabinets as a box for the fridge, and the end of the pantry has its cover panel attached too.
Today we started assembling the drawers. Luckily Ikea includes the ability to adjust the drawer fronts up & down, left and right and back and forward. Although we found that where they told us to add the second drawer at row 13 of the holes (from the bottom) no matter how many adjustments we made the drawer front were still banging together for nearly a half inch. Which meant we had to adjust the middle drawer to be attached at the 14th hole, which meant the third from the bottom drawer had to be adjusted from hole 21 to hole 22. Which means the divider shelf had to move up a hole too. Sort of annoying as all the YouTube videos have people just tossing their drawers in at the proper spots and they fit fine. I am telling myself they deliberately lied for the video. But we’ve made it work well enough for us.
We still have lots to do with these cabinets (shelves and doors, along with adding handles to the drawers & doors) but progress has definitely been made!
I really like the Ikea suspension rail they have developed to hang their cabinets on–it’s much easier to level the entire rail and shim it as needed if the wall is bendy (Luckily, that particular wall was pretty straight horizontally along the rail.) The main problem was the scarcity of studs at the height we needed to hang the rail. We only found two studs along the full 84 inches. And believe me, we made holes all along that section of wall looking for any studs.
What we think the previous owners did when they created the passthrough was that they pulled out the upper studs, added a rectangular frame for the passthrough and left the lower studs (that were 24″ apart) to support that frame. But above the hole they’d created, the part where the suspension rail needed to be attached? Well, I wouldn’t be surprised to learn they’d removed the upper studs entirely. Or perhaps they built a second framed box but only used one vertical support in the middle of that five foot span. Even more to our surprise was that we found no stud in the actual corner of the room where there definitely should have been a stud. We ended up using wall anchors every few inches, then added more beneath the rail as suggested by a contractor as that should double the weight the rail can hold. And where we did find a stud? We definitely used it.
the bubble in the horizontal level section is supposed to be in the middle, not the far left corner the way it is
yes it took 3 shims (this is a Work in Progress: it still needs to be prettied up as it will be visible–if the fridge is pulled out from the wall. So hardly ever.)
The adjoining wall was actually fairly straight so we won’t have to scribe the filler strip between the cleaning cabinet and the wall. (You need to leave 2 inches between your cabinets and the side wall so when you open a door the handle won’t hit the wall and stop the door or drawers from opening properly. A problem we’ve had with our current fridge position so we can’t properly access our freezer.) The problem we discovered was that wall is definitely not plumb vertically. To solve that issue we had to liberally use shims at the bottom of the part of the cabinet that touched the wall so anything placed in the cabinet wouldn’t roll to the front and fall out. Luckily that was a fairly easy job to accomplish. The high cabinets have feet that help level that issue, though we still used shims as they weren’t touching the wall at the base. The over-the-fridge partial cabinet was also easy since you could simply shove shims in from underneath. But still, it was shocking how many shims it took to level it.
I know so many people like the open-concept plans in their houses but hubby and I aren’t a fan of them. I did like the light the passthrough offered in sharing light between the kitchen and the dining room, but the previous owners had done a real botch job with twisty beams and a really ugly 4′ plus 1′ joined shelf which had always bothered me. Plus by filling in that wall and installing high cabinets, it gives us a ton more storage space. We’d already had cabinets in that spot anyway, a three foot by six foot hutch for the microwave tucked in the corner, and another 3′ x 2′ computer table for our rice cooker and air fryer beneath the passthrough, which gave us some extra shelves for more desperately needed storage space. So we were used to having that wall filled with 24″ deep cabinets anyway. But I must admit, while installing the cleaning cabinet in the corner didn’t make me blink, the over-the-fridge cabinet (which is 25″ deep) made me blink at just how big it is. I think it’s a mental thing because other than the microwave cabinet which was nestled in the corner, the old stuff wasn’t at eye height in the same in-your-face way. It’s also turned the kitchen in a sort of a galley kitchen though there is six feet between the two runs of cabinet and I can definitely live with that amount of space compared to the squashed galley kitchen of our previous house. It’ll take some getting used to, but I know I’m going to love it and adjust very quickly, especially given how much storage these cabinets will add.
even the cat tried to help. Okay so he slept through most of the work but he kept us company
Despite the photo above showing him lazing around, our poor cat is not happy with all the changes. He’s actually become a little clingy and tried to help us build the pantry. By lying on it in the exact spot where we needed to place some screws and dowels. It added some chuckles to the day at least. He ended up settling for the stretching out to the side on the cardboard.
Oops, this cereal box is still too big!
One thing I was disappointed to find was that despite the cavernous size of the over-the-fridge cabinet, it’s still not high enough to house my hubby’s favourite cereal. I had figured that would be the only cabinet large enough to house that enormous cereal box. My fault that I hadn’t measured it to check. Yes, I can make shelves far enough apart in my pantry but what a waste of space for a single cereal box. I predict an upcoming trip to the Dollar Store to see if they have a big enough container to house that cereal while fitting into the new pantry after all. Good thing restrictions are being lifted so we can start going into stores again. If I can a nice cereal container, I’ll count that as a win on two fronts.
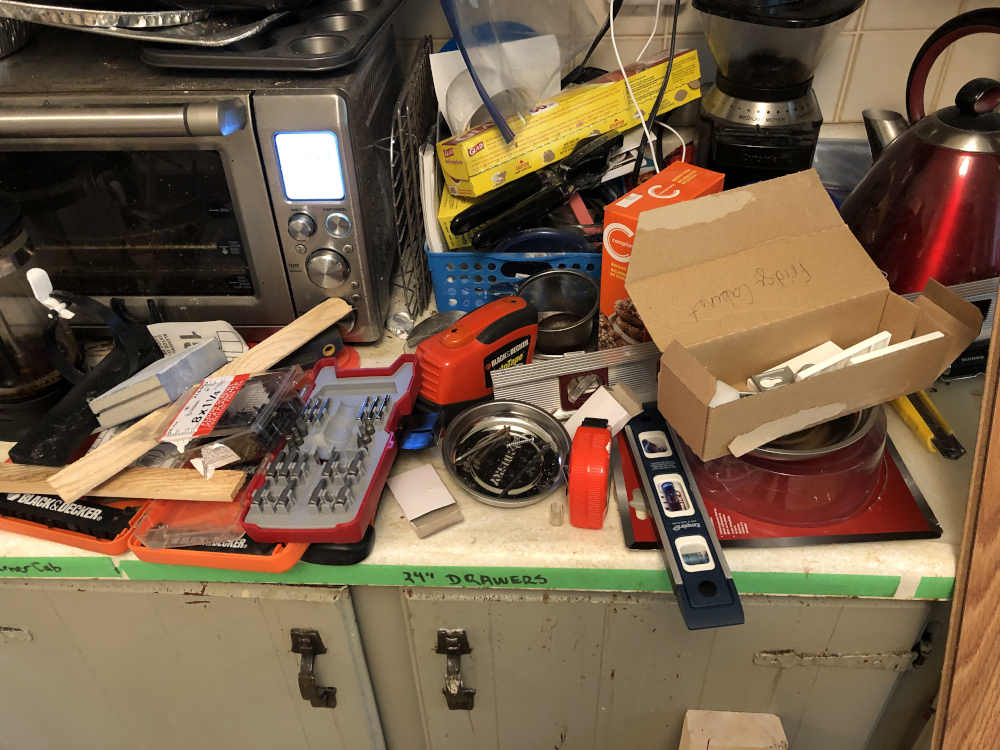
What is NOT fun is dealing with all the tools and mess renovation entails. It’s all necessary, and we are dealing but it gets old FAST. Many of our small appliances are currently located in the dining room, along with some of our cooking bowls etc. Plus we are having to store some of the cabinets we are building in the dining room. It’s become a bit of a maze to get from the kettle and coffee pot to the microwave to set a kitchen timer. I clean it up at the end of the day (yes, note that singular pronoun, that’s a rant for another day) but during the day, it is a challenge for everyone. Still, we will prevail. Especially since we know it’s about to get worse as that counter is the next thing to be torn out and we’ll have even less workable space.
Try making lunch (or coffee) when this is all your available countertop left in the kitchen. And yes, note those horrible ugly unwashable cupboards beneath. No those aren’t drips, those brown spots are were the paint has flaked off as they didn’t prep the wood before they did the worst paint job in history. Luckily those cabinets are destined for the skip in the coming weeks.